pvigier's blog
computer science, programming and other ideas
Room Generation using Constraint Satisfaction
Two weeks ago, I was part of Roguelike Celebration and gave a talk on room generation using constraint satisfaction. It was great! Here is the video of my talk:
I don’t know why but the sound is a little jerky at times. :( And with my terrible accent, it may not be easy to understand certain parts. So I will transcript the talk in this article.
Before we start, you can get the demo code that accompanies the talk on my GitHub account and the slides here.
What’s a Room Generator
So let’s start by defining, what’s a room generator.
| Before | After |
|---|---|
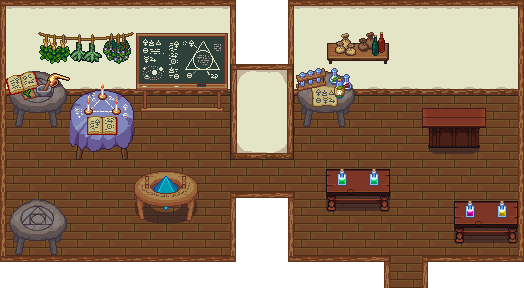 |
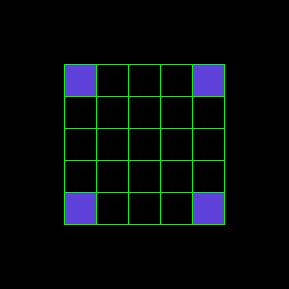
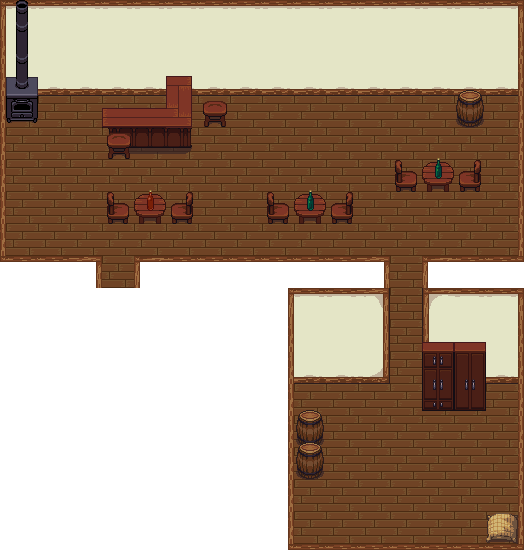
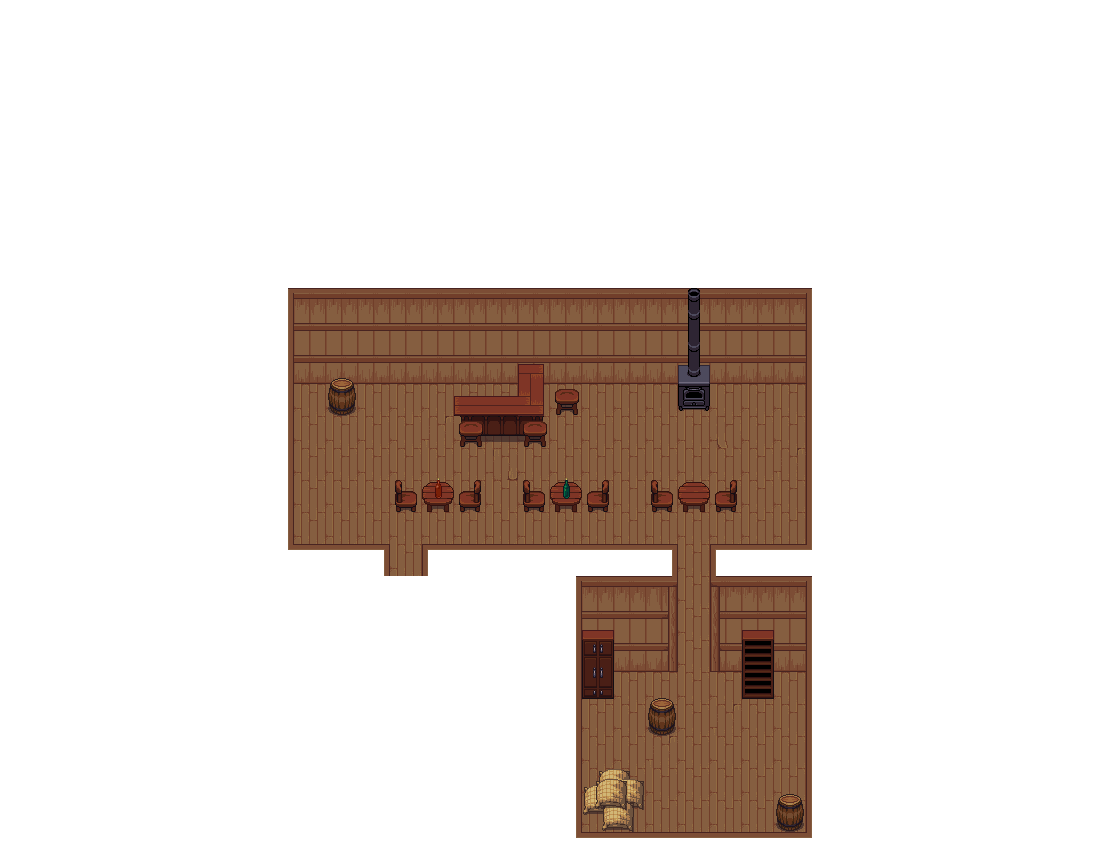
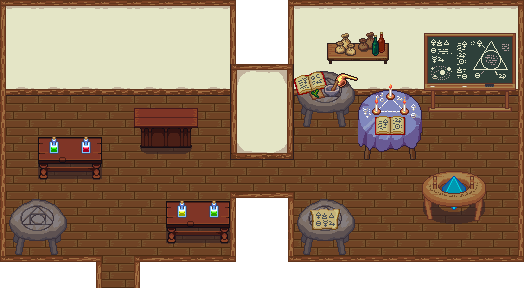
The input is simply any structure, it can be a building, a dungeon, anything. And it doesn’t matter what algorithm generated it. As it looks desperately empty, we want to fill the structure with objects, decorations and monsters. That’s what is room generation.
| Before | After |
|---|---|
 |
| Before | After |
|---|---|
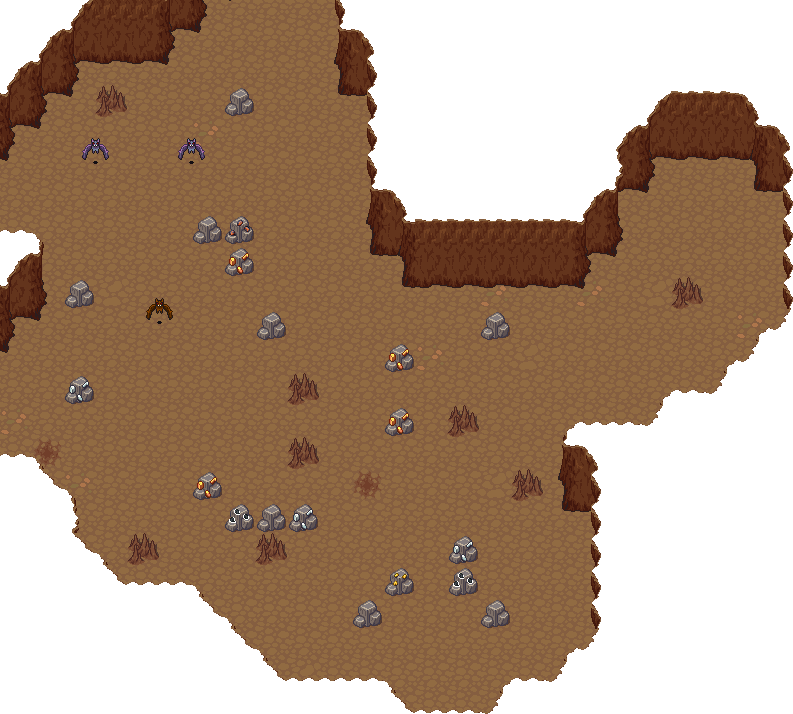 |
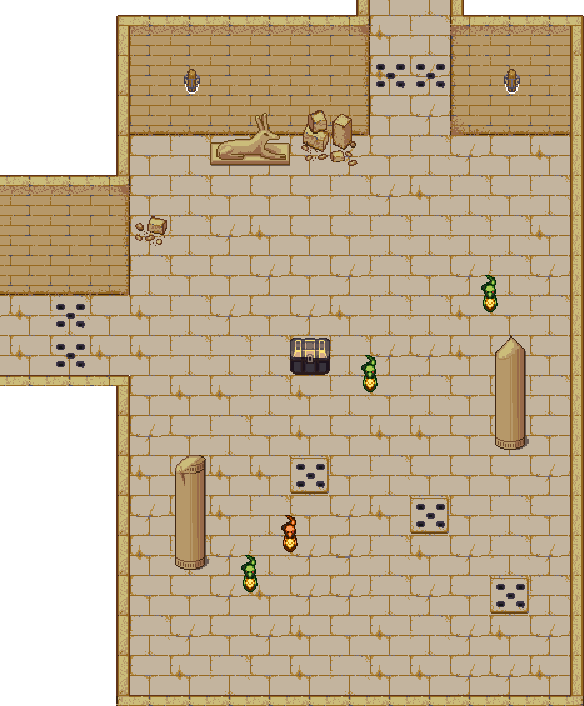
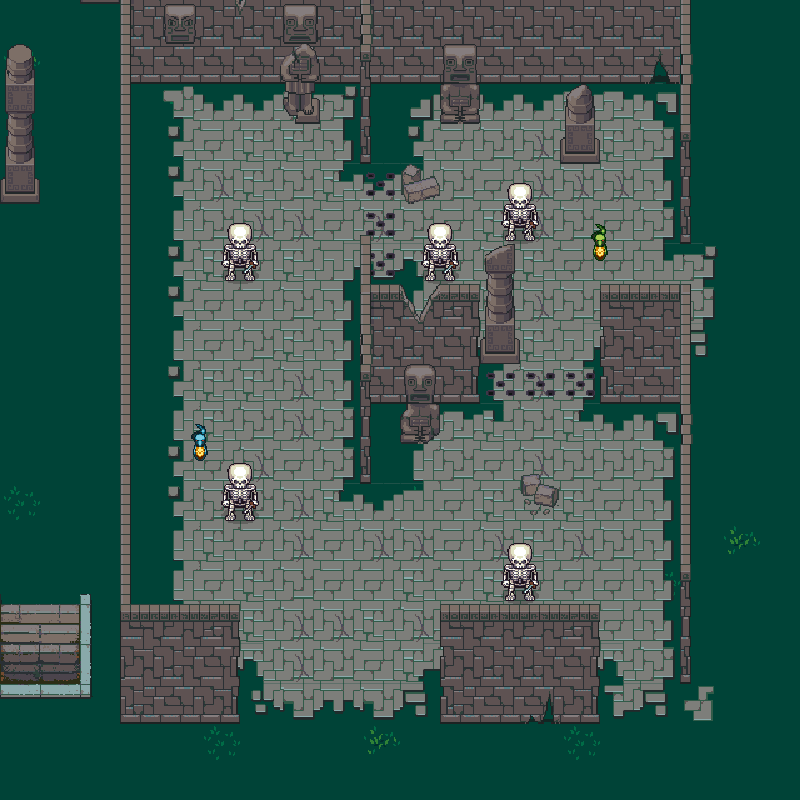
It works for buildings, but it also works well for caves or dungeons.
 |
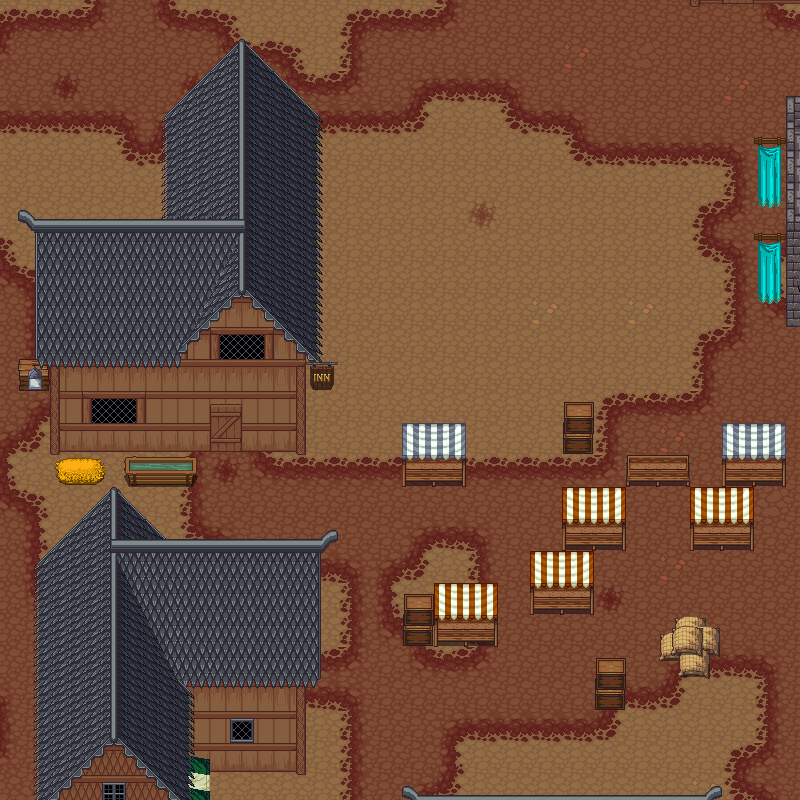 |
And even for outdoor structures like the ruins on the left, or for the market place in this village.
What’s a Constraint Satisfaction Problem (CSP)?
The generator is based on constraint satisfaction problems that I will abbreviate as CSP.
A CSP is composed of three things:
- There are variables which in room generation will represent the objects to place in the room.
- There is a domain for each variable. They are the finite sets of possible values for each variable. In room generation, the domains are simply all the possible positions for each object.
- There are the constraints, which are predicates on the values taken by the variables. In room generation, we may require that objects don’t overlap, that there are paths to access objects or we may want specific objects to be against a wall or in a corner.
Solving a CSP is just finding an assignment that satisfies all the constraints.
We can notice two things. First, it’s very intuitive to use. If we want to have a shower next to a wall, we just have to add a constraint to do so. And we have strong guarantees on the output, which is always a nice thing in procedural generation.
Basic Solver: Backtracking
Now, let’s see the basic algorithm to solve a CSP. It is called the “Backtracking Algorithm”.
![]()
This is just a refined brute force approach, we will enumerate all the possible assignments by recursively assigning the variables one after the other.
The only subtlety is that each time we try to assign a variable, we check the constraints, if they are satisfied we move to the next variable with a recursive call. But if the constraints are not satisfied or the recursive call fails, we move to the next value in the domain. And if there is no value left in the domain, we backtrack to the previous variable.
def solve(i, assignment):
    if i >= n:
        return True
    for value in domains[i]:
        assignment[i] = value
        if check_constraints(i, assignment):
            if solve(i + 1, assignment):
                return True
    return False
It’s simple as you can see it’s less than 10 lines of code. And, it works very well, if there is a solution to the problem, it will find it. And with the constraints that I am presenting here, it is also very fast.
But as we always try the values in the same order, the solver is deterministic and will always output the same solution. Not ideal for a procedural generator.
How to Turn That into a Generator
However, it is very easy to fix this problem.
![]()
We just have to shuffle the domains each time we want a new room.
If you are using an external library to solve your CSPs, just make sure that the selection process of values in domains is random.
Notice that the order in which the variables are processed doesn’t matter. And it doesn’t need to be random.
In fact, there is a heuristic called “Minimum Remaining Value” that can speed up the solver significantly. It consists in assigning the variables with smaller domains first because they are more constrained than the others.
Modeling the Room
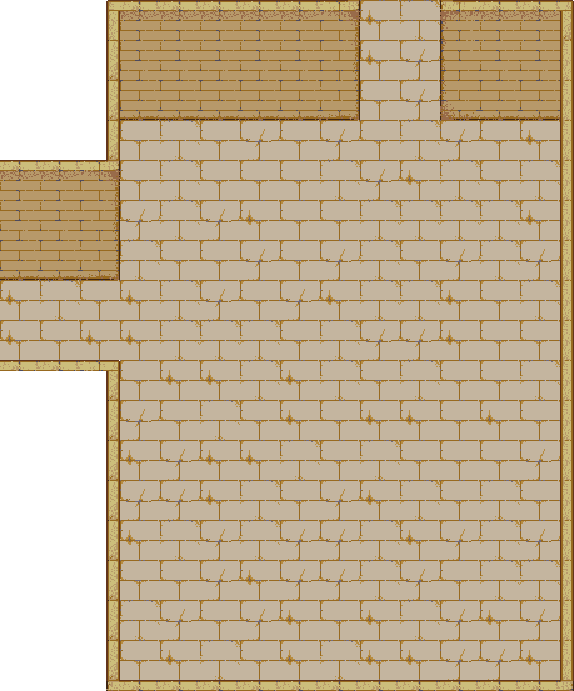
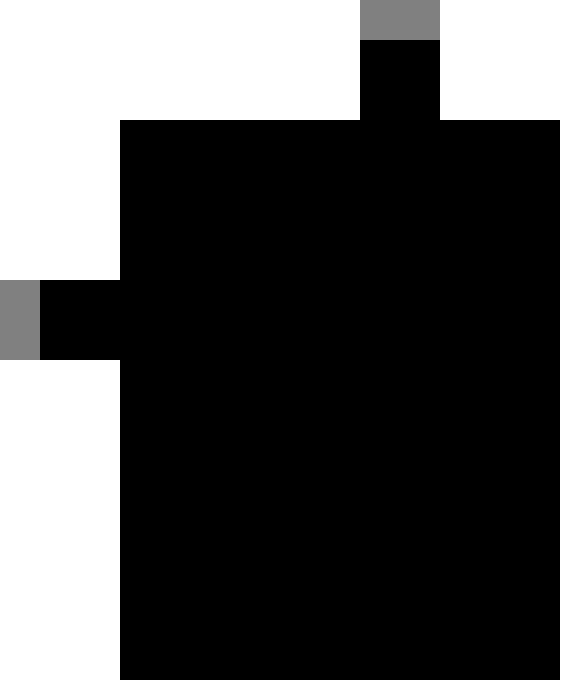
The structure of the room is simply represented as a 2D or a 3D grid.
| Room | Grid |
|---|---|
 |
 |
 |
A 3D grid can be useful even for a 2D game. For example, in my game, I use a 3D grid with three layers to be able to have objects above others.
Cells in this grid can be in three different states:
- The empty state, when a cell is free and can receive an object. These are the black tiles on the pictures.
- The margin state when a cell is free and we want it to remain free. These are the grey tiles on the pictures. We can notice that the connections to the other rooms are margin cells to make sure that these tiles remain free.
- The full state when a cell is already physically occupied by an object or a wall. These are the white tiles on the pictures.
We may also want to add more data to a cell like marking it as a wall or a door which will be useful for certain constraints.
Modeling the Objects
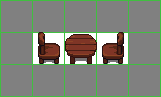
First, I find it more useful if a variable can represent not only one object but a group of objects. For example, a table with two chairs.
We could do that by using several variables and constraints to force the objects to be next to each others. But it would make the CSP much more complex and difficult to solve for no good reason.
Then, I specify a collision box which is the physical space that the objects will occupy.
And a margin box which will be the space around the objects that will need to remain free for gameplay or aesthetic reasons.

For example, we want space in front of the forge to make sure the players can access it.
Finally, I added the support for optional boolean masks for the two boxes to be able to add finer details if needed. As you can see with the counter.
More Randomness
I specify the lists of objects for my rooms in JSON and here is what looks like the definition of a variable.
{
    "objects": ["Painting1", "Painting2", ...],
    "constraints": [
        {
            "NextToWallConstraint": {}
        }
    ],
    "range": [1, 3]
}
First, we can notice that for a given variable I sample among a list of objects. In the example, I want to add a painting in the room and I choose among a list of them.
Then, let’s observe that the more we add variables to the CSP, the more difficult it will be for the solver to find a solution. And there are some objects like decorations, if the solver fails to place them, it’s not a big deal, the room stays valid.
So I separate the objects in two lists. The required objects which are the objects that the solver needs to place, otherwise the room loses its meaning.
And the optional objects, the solver will try to place them after the required objects but it will just try each value in their domains once and don’t backtrack if it fails to place an object.
What’s nice with optional objects as they are not required, we can make them more random with for example a probability of appearance or a random count. For example, the paintings have a range attribute and the solver will try to place between one and three in the room.
I will stress more on that at the end of the talk but optional objects are very useful to add variability in the generated rooms.
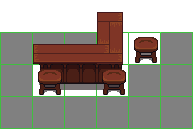
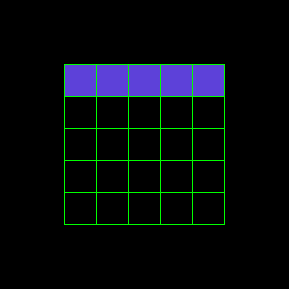
Unary Constraints
Let’s look quickly at some of the constraints.
The simplest constraints are the unary constraints. They are the constraints that deal with only one variable.
For example, you want an object to be at a certain distance to a wall or in a corner.
The strategy for these constraints is just to remove the values in the domain that don’t satisfy the constraint before running the solver.
 |
 |
So if you add a constraint that an object needs to be against the north wall, the domain will be only the purple cells of the first row. And if you want the object to be in a corner, the domain will be only the four purple cells in the corners.
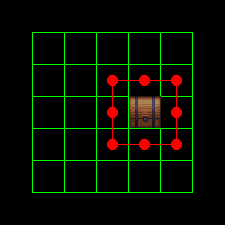
No Overlap Constraint
The two next constraints are so important for room generation and they need to be implemented efficiently that I baked them directly in the solver.
To quickly check the overlap between objects, we will just reuse the grid we got as input but we will update it after each assignment or backtracking. After an assignment, we add the object, and after a backtracking, we remove the object.
Connectivity Constraint
The connectivity constraint implies that all the free cells must be reachable.
You can check that using a simple depth-first search algorithm. But you would need to run the DFS after each assignment which could be very expensive.
There is a little trick that can help a lot.
 |
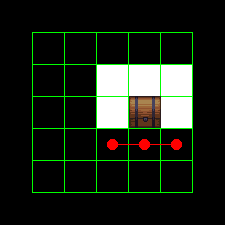 |
If we look at the tiles around the object we just placed, and the free tiles are in one piece, then we are sure that the room is still connected.
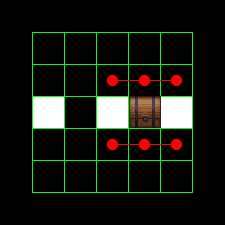 |
 |
|---|---|
| Don’t disconnect | Do disconnect |
However, if the surrounding is in two or more pieces then, we may have disconnected the rooms and we need to run the expensive DFS to check. This heuristic can save us most of the DFS calls.
“10’000 bowls of oatmeal” Problem
So far so good but we have an issue and it has a name, it’s called the “10’000 bowls of oatmeal Problem”.

It says that we can very easily generate a lot of bowls of oatmeal by just changing the position or the rotation of each oat, but they will all look the same.
In our case:
- the bowl is the room.
- the oatmeal is the objects.
And as you can see on the picture, if we use the same input, the solver just move the objects in the rooms and we get a very similar output.
Solution 1: Change the Bowl
The solution to the 10’000 bowls of oatmeal problem is of course, as all procedural generation practitioners know, to generate different bowls. Different shapes of bowls, different colors of bowls. And that way, all the bowls are different!

Of course, I’m kidding but there is an idea there to mitigate the issue.
If you change the context in which the objects are seen, the pattern may be less recognizable.
You can play on the shape of the structure, the textures, the skins of objects, etc.
Solution 2: Don’t Just Eat Oatmeal
But the real solution to the 10’000 bowls of oatmeal problem is of course to change the inputs.
First, don’t overuse a room template. In particular, avoid using the same room template for two rooms close to each other.
Then, use alternative and optional objects. As explained, it helps to add variability in the room templates. That’s what we can see on the animation.
The best solution is to have a higher level generator to generate the inputs to make the room very different or so that they have more meaning.
For example, maybe you have to generate a house for a character. And you have already generated the hobbies for this character. Let’s say he’s fond of astronomy. That would be nice, if you can inject this meaning into the room generator and place a telescope in the house.
Tags and Triggers
One nice and simple way to achieve this, that I am using in my game, is to use tags and triggers.
Your other generators will generate a context which is just a bag of tags. In our example, it will contain the tag “hobby_astronomy”.
{
    "objects": ["Telescope"],
    "trigger": "hobby_astronomy"
}
Then, in the object description, you just add a trigger that will add the object only if the given tag is in the context.
That way, your generators are only loosely coupled. And if you need it you can make more advanced conditions for your triggers using propositional logic.
Conclusion
To conclude, I would say the using CSP in your generators is easy to reason about and easy to implement. But be careful of the 10’000 bowls of oatmeal issue.
Here are some references if you want to go further in some of the topics we dealt with:
- On CSP Theory: Chapter 6 of Artificial Intelligence: A Modern Approach, Russel & Norvig
- On “10’000 bowls of oatmeal” issue: So you want to build a generator…, Kate Compton
- On Tags: Procedural Level and Story Generation Using Tag-Based Content Selection, Jurie Horneman in Game AI Pro 3
If you are interested in my adventures during the development of Vagabond, you can follow me on Twitter.