pvigier's blog
computer science, programming and other ideas
Vagabond – Generating Tiles
This week, my goal was to generate the world in which the players will move from the symbolic map I worked on the last weeks.
The examples in this article are quite small (600x600 tiles) to be able to see the whole world at once. The worlds in Vagabond will be way larger.
Rasterization
The process of taking shapes and discretizing them in a 2D grid is called rasterization. It is exactly what your graphic card does when it takes some 3D models made of polygons as input and outputs an image which is a 2D grid of pixels.
This is also what we want to do: we have a map as input and we want a 2D grid of tiles as output. Thus we can leverage on the techniques of rasterization to generate the tiles.
There are two main primitives in rasterization: drawing a line and drawing a triangle. Fortunately, there are very efficient algorithms for doing that. I have put some useful resources in the last section of this article if you are interested in the theory of rasterization.
In the first article of this series, I said that I wanted my map generator to output a data structure easy to manipulate. Thus I chose to generate a polygonal map using a Voronoi diagram. Now, it proves useful as polygons are quite easy to rasterize.
Rasterizing Cells
The first step in rasterizing a polygon is splitting it in triangles so that we can use the triangle drawing algorithm. As our cells come from a Voronoi diagram, we know that they are convex, so it is very easy to triangulate them. One way of doing it is just taking a point inside and linking it with the edges as depicted below.

Once it is done, we just have to run the triangle drawing algorithm on all the triangles of the cell, and assign the terrain for all the coordinates inside the triangles.
Here is the result:
By the way, I am using the awesome LPC terrain tileset.
Rasterizing Borders
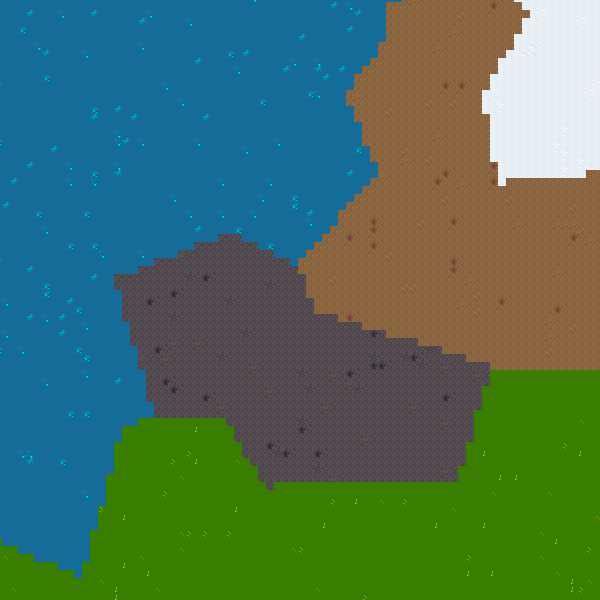
The next step is taking care of borders between two cells. Indeed, a border belongs to the two (or more) adjacent cells. But, currently only one terrain is assigned to each tile.
To fix this, I draw all the edges separating cells using a modified version of Bresenham’s algorithm (which does not allow to move diagonally) and assign the terrains of adjacent cells to the tiles on the border.
Here is the result:

By the way, another method I tried to rasterize the map was to first draw the borders of cells and then to use a flood fill algorithm to assign the terrain inside cells. This method is appealing as it is simpler but it proves to be slower and less robust than rasterizing the cells using triangles.
Finally, I wanted to rasterize cells with the distorted borders I showed last week. To do that, I just use a finer triangulation that takes into account the distortion:

And here is the result:
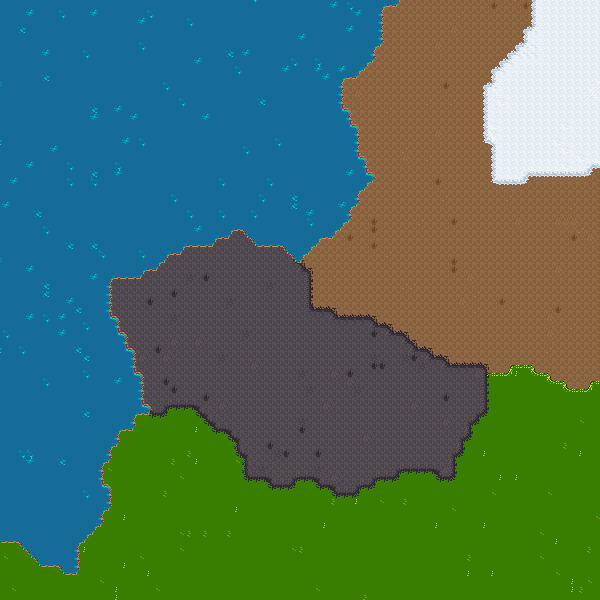
It is much more appealing than the straight borders!
Conclusion
I have not progressed very quickly this week as I knew nothing about rasterization at the beginning of the week. So I had to learn and experiment a lot to obtain good results.
If I have one piece of advice to offer: it is to use algorithms that avoid floating point numbers such as Bresenham’s algorithms as they are faster and there are no rounding issues.
I have already started to work on rasterizing roads and rivers but it is not finished yet. I will polish that next week and generate some vegetations to fill the biomes.
See you next week for more!
Useful Links
- Tiny Renderer by Dmitry V. Sokolov
- Software Rasterization Algorithms for Filling Triangles by Bastian Molkenthin
If you are interested in my adventures during the development of Vagabond, you can follow me on Twitter.